Have A Question On How I Did Something? PLEASE READ!
I love to share what knowledge I have. I'm finding it more and more difficult to respond to your questions because some of you are not leaving a way for me to contact you. I am not ignoring those of you who have questions, but the majority of the time no contact information is given so I am unable to respond to your inquiries. If you are serious about me answering the questions you ask and do not have a Blogger account with an email address linked to it, please leave your email address or email me with your question at knmic1012@aol.com and I will get back with you. If you email me, be sure to put "blog question" in the subject line so I won't think it's SPAM and delete it.

Friday, July 31, 2009
Blessed Are Those...
Happy Friday Everyone! While shopping on line yesterday, I came across a stamp that made me stop and think. Rarely do I look at word stamps, as you know, I do a lot of computer generated sentiments but this one caught my eye. Rather that buy the stamp, I tried by hand at putting it on the computer and even though it looks nothing like the stamp I saw, the message is the same. I printed it on the computer then cut and layered it on an oval/scallop Nestibility. The background layer was embossed with Cuttlebug Script Texture embossing folder. The flowers were cut with a Marvy Daisey punch, the center of the flowers were cut with a dollar bin punch I got at Michael's then added a flat back gem stone and placed them on a .flourish cut from Quickutz. That's it for today, enjoy your weekend and I hope to see you back here on Monday!

Thursday, July 30, 2009
Ever Had One Of THOSE Days?
Good Morning Everyone! Just a real quick card this morning because I can tell it is going to be one of THOSE days for me! The image is a Dustin Pike image that was colored with Prisma pencils and OMS then layered on a scallop Nestibility. The background layer is embossed with Cuttlebug Distressed Stripe embossing folder. Some flatback gems and ribbon/knot were added. Words are computer generated. Thanks for stopping by for a visit, hope you enjoy the rest of your day!
P.S. I wasn't real happy with the way the picture turned out, the colors are all wrong and it looks washed out. I'm going to try to take another picture as soon as the sun comes up, if it turns out better I will edit the posting.
Wednesday, July 29, 2009
Hey...That's MY Spot
Good Morning! I've wanted to make this card for a while now but haven't had the chance with so many birthdays, illnesses and other occasions that have come up. I finally got the opportunity. It is going to be sent to my grandson that turned 3 years old last week, and it won't mean anything to anyone except those that know him. Many months ago he had come up with the phrase "Hey...that's my spot" every time you would go to sit down. My son said he didn't know where he had come up with it but I know exactly where, I can hear my son saying it to him now. I was watching him a while back, we were about to eat lunch and I told him that he was sitting in MY SPOT, he told me that he wanted to sit in my spot, I could sit in grandpa's spot since he wasn't there. Anyway, that is what inspired this card. The image is a free coloring page that was found on line---
http://www.google.com/imgres?imgurl=http://woodysroundup.homestead.com/files/ColorDalmationChick.gif&imgrefurl=http://woodysroundup.homestead.com/coloring.html&h=810&w=619&sz=12&tbnid=Zb3IzfF2rejw7M:&tbnh=144&tbnw=110&prev=/images%3Fq%3Ddalmation%2Bcoloring%2Bpages&usg=__ghv9jeTh90AvPVbSY-R8y3RLLl8=&ei=aOBtSteLLOH7tgfjmoiJDA&sa=X&oi=image_result&resnum=4&ct=image
The image was printed twice, once colored with Prisma pencils and OMS, the other cut and pop dotted on the image then layered on a rectangle/scallop Nestibility. The background layer was embossed with Cuttlebug Swiss Dots. The lettering "Hey" is Spellbinders and the "That's MY Spot!" is computer generated then cut and layered on an oval/scallop Nestibility. Ribbon and bow were added along with Glossy Accents to the eyes. That's all I have for today, thanks for stopping by. If you enjoy your visit, won't you leave me a comment to let me know! Have a fabulous day!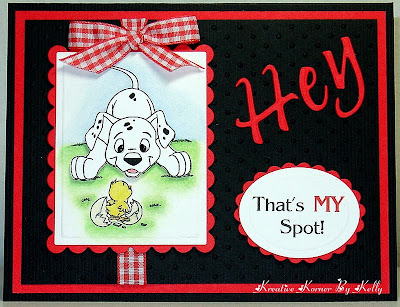
Tuesday, July 28, 2009
It's Your Day...Spoil Youself Silly
Good Morning! Just a quick card this morning. The Penny Black image was colored with Prisma pencils and OMS then layered on circle/scallop Nestibility. A paper piercer was used on the scallops and a ribbon bow was added along with some glitter to the bubbles and glossy accent to the margheritta . That's it for today, thanks for stopping by, have a fantastic day!


Monday, July 27, 2009
Thinking Of You
Good Morning! I hope everyone had a great weekend! Here's a little "Thinking Of You" card I did this morning that was pretty simple. The background layer was embossed with the Cuttlebug With Love embossing border set and Swiss Dot embossing folder then I used the Scor Pal to add the lines between the embossing. The leaves were cut with the Sizzix Little Leaves die, then added flowers cut with a small Marvy Daisy punch. For the center of the flower I used a dollar bin punch from Michael's and added a little glitter and flat back pearls. Words are computer generated then cut with a circle/scallop Nestibility. That's all I have for you today. Thanks for stopping by, I hope you have a great day. If you leave a comment with a question as to how I did something, please leave your email address if you are not signed into Blogger so that I can get back with you. If you leave a comment and click the anonymous button, I'm not ignoring your question, I just have no way to reach you.
Saturday, July 25, 2009
Missing You
Good Morning and Happy Saturday. I usually don't post on the weekend but I had made this card yesterday and didn't get a chance to post it. It was inspired by my good blooger friend Migdalia. She asked how I had left a space for writing on the "Beary 4 Card Set" and even though the embossing folders I had used had the open space, I had forgotten all about the technique to leave the space. This embossing folder is one of my favorites and decided to use it on this card that I'm going to send to my granddaughter. Let me know what you think---
I colored the Angel's Landing digital stamp image with Prisma pencils and OMS then layered it on a circle/scallop Nestibility and added a craft yarn bow to the bear's head, rain hearts and a ribbon bow to the Nestibility that was pierced with a paper piercer on the scallops. Her name was computer generated. The background layer was embossed with Cuttlebug Love Language combo set embossing folder and Scor Pal was used for the lines. The missing you sentiment was cut from the Cuttlebug Friends Forever combo set. Heart buttons with craft yarn threaded through the holes and tied in a bow were added. That's it for today. If you enjoy your visit, leave a comment or sign my guest book. See you on Monday, hope you have a great weekend!

I colored the Angel's Landing digital stamp image with Prisma pencils and OMS then layered it on a circle/scallop Nestibility and added a craft yarn bow to the bear's head, rain hearts and a ribbon bow to the Nestibility that was pierced with a paper piercer on the scallops. Her name was computer generated. The background layer was embossed with Cuttlebug Love Language combo set embossing folder and Scor Pal was used for the lines. The missing you sentiment was cut from the Cuttlebug Friends Forever combo set. Heart buttons with craft yarn threaded through the holes and tied in a bow were added. That's it for today. If you enjoy your visit, leave a comment or sign my guest book. See you on Monday, hope you have a great weekend!
Thursday, July 23, 2009
Digital Delights New Release Is Going On NOW!
Wendy at Digital Delights has been busy working on a set of new digital stamps and today she is releasing a new set of images that she calls "Space" Zoom on over there to see what she's come up with---
While you are there, check out what the other Design Team members have come up with.
Here's what I came up with using the image Alien Andy and the sentiment. I colored him using Prisma pencils and OMS then layered him on a small rectangle/scallop Nestibility. The sentiment was printed then layered on a circle/scallop Nestibility. The background layer was embossed with Cuttlebug Spots and Dots embossing folder. I used Fiskars Threading Water Border punch for the scalloped edge, added a few stars cut from the Cuttlebug snowflake die, a craft yarn bow, glossy accents to the body and some ribbon.
You Are So TWEET
Good Morning Everyone! I'm posting a little bit early today, I have been neglecting my house and I promised my husband that I would get something done around here today. It just seems like I don't have a lot of time to craft and do housework with having to take him to physical therapy 3 times a week. Between the 2, housework or crafting, it's a no brainer which one should win out but today it's got to be housework...LOL!
Anyway, here is the card I did for today...It's an Angel's Landing digital image that I colored with Prisma pencils and OMS. I printed it twice, layered one on a small rectangle/scallop Nestibility, then cut the other out and pop dotted it on the image. You can't really see it from the front view so I also took a side view picture as well. The background layer is embossed with Cuttlebug Swiss Dot embossing folder, that I used a Stampin' Up ticket punch for the corners and added flat back pearls. The flowers are cut from the smallest Marvy Daisy punch and the centers of the flowers were cut from a dollar bin punch from Michael's and added a flat back pearl. I added a few sprigs of Martha Stewart Branch punch and a ribbon. Words are computer generated.
Here is the side view.
Thanks for stopping by, if you haven't already,make sure you leave a comment or sign my guest book before you leave. I know I have had a ton of new traffic from Sue Nelson's Heartprints Website, and because Blogger is having issues with the Follower Feature, those of you that wish to follow my blog may not be able to, if that is the case, be sure to check back often to see if the issue has been resolved. Those of you that are not familiar with Sue Nelson, be sure to visit her website, not only is she a sweet lady but much of what I have learned has been from her---
Also, Be sure to stop back after 11:00 EDT. Wendy over at Digital Delights is having a new release today so I have scheduled a posting for then. Hope you have a great day, and as always, Happy Crafting...as for me...I will be doing housework...LOL!
Tuesday, July 21, 2009
Always On Our Minds...Forever In Our Hearts
Hello Everyone! Here is a quick card that I did this morning using a digital stamp from Angel's Landing---
http://www.angelslanding.com/stamps-crafts/products/products.html
then colored it with Prisma pencils and OMS. I printed it twice, layering one on a circle/scallop Nestibility, then cut the other and pop dotted it on the image. I used a paper piercer around the circle and added a few springs of card stock cut with EK fern punch. The sentiment is computer generated then layered on a strip of card stock cut with a Fiskars edge punch. I added some ribbon with a bow and silver rain hearts. Thanks for stopping by, hope to see you again tomorrow...Have a great day!
Monday, July 20, 2009
Thank You...Beary Much
Sunday, July 19, 2009
Friday, July 17, 2009
Hope You'll Be Feeling Better Berry Soon
Happy Friday! Thanks for stopping by, I hope you enjoy your visit. Given the investment of time and lack of comments, I have decided to no longer include the instructions on my cards. If you would like more information, please leave a comment and I will get back with you. Hope you have a won derful weekend!
Tuesday, July 14, 2009
Summer Fun
Good Morning All! This is the first chance I've had to play with the order I received from Scrapyland over the weekend. The jury is still out on this one...I'm not sure I like it, but wanted to post it to see what you thought. I put the Go Kreate Summer Boo clothes on Boo On His Bum then layered it on a Nestibility heart/scallop that was embossed with Cuttlebug Love Language embossing folder. I Added a ribbon bow, gemstones and gel pen dots around the scallop heart. The words are computer generated. That's all I have for you today...Thanks for stopping by. See you tomorrow, I hope you have a fabulous day!
.JPG)
Monday, July 13, 2009
Just A Little Note To Say...HELLO!
Good Morning Everyone! I hope you had a great weekend! My son and daughter-in-law stopped by unexpectedly on Saturday and it's always nice when we have a chance to see our grandson. I can't believe he will be 3 years old on Wednesday...my how time flies! He is our little miracle baby, he was born in the 32nd week weighing only 3 pounds but quickly dropped down to 2.6. He sure has come a long way, he is just as smart as a whip, being a preemie hasn't hurt him at all!
I know you are probably getting tired of seeing these flowers (because I sure am...LOL) I promise this will be the last one I will make with them for a while. I sure have gotten my $1.99 worth out of them...LOL! It's an acetate card so it was a little difficult to photograph. I stamped the acetate with a dollar stamp from Michael's and an Inkadinkadoo butterfly that I added 3mm flat back pearls to. I pop dotted the flowers on layers of card stock that was cut with Quickutz Flourish die and added flat back pearls. Added word generated sentiment then cut it with a small rectangle/scallop Nestibility and added a bow. Pretty easy huh?
Well that's it for today. Thanks for stopping by and if you get a chance leave a comment or sign my guest book to let me know what you think! Hope you have a fantastic day...see you tomorrow!
Friday, July 10, 2009
Just A Note To Say...
Good Morning! This week has gone so fast, I can't believe it is already Friday! I'm so glad that you stopped by today, I hope you enjoy your visit, and will return again soon!. It would be so nice if you would leave a comment or sign my guest book to let me know that you visited. Your comments mean SO much to me, it makes it seem as though you are really a part of my blog, and you know how much I enjoy sharing my designs with you!
Today's card is quite simple. The image is a Sarah Kay image that I got on line---
http://picasaweb.google.dk/silmara.marian/RiscosSarahKey#
I colored it with Prisma pencils and OMS, added some glitter to the tiny flowers then layered it onto card stock that I cut with Fiskars Threading Water Border Punch. The holes were covered with flat back gemstones. I added a ribbon and a butterfly button. Words were computer generated.

That's it for today. Thanks for stopping by, and if you haven't already, don't forget to leave a comment or sign the guestbook. Hope you have a fantastic weekend, I will see you Monday!
Today's card is quite simple. The image is a Sarah Kay image that I got on line---
http://picasaweb.google.dk/silmara.marian/RiscosSarahKey#
I colored it with Prisma pencils and OMS, added some glitter to the tiny flowers then layered it onto card stock that I cut with Fiskars Threading Water Border Punch. The holes were covered with flat back gemstones. I added a ribbon and a butterfly button. Words were computer generated.

That's it for today. Thanks for stopping by, and if you haven't already, don't forget to leave a comment or sign the guestbook. Hope you have a fantastic weekend, I will see you Monday!
Thursday, July 9, 2009
Midnight Madnees Sketch Challenge-MMCS9
Hey Bloggers...It's me AGAIN...! Here is a card I did tonight for Sketch Challenge #9 over at Midnight Madness---There's a lot of creativity going on over there so treat yourself to a helping of inspiration and visit them at---
http://priscillastyles.blogspot.com/
This is a first for me so I hope I'm doing it right...you know me and computers...LOL!
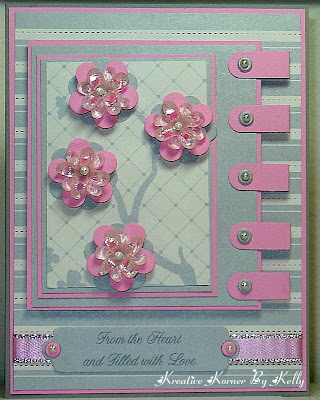
The card is really pretty simple, I used Stampin' Up word window punch for the tabs then added dots cut with Cuttlebug 3x3 Party die and added 3mm flat back pearls. The blooms were cut with Quickutz Flourish die, cut once in silver and once in pink then attach to the layer of Making Memories paper then added flowers from my stash. Words are computer generated then cut with a Spellbinders tag and ribbon added. Thanks for stopping by...wish me luck!
http://priscillastyles.blogspot.com/
This is a first for me so I hope I'm doing it right...you know me and computers...LOL!
The card is really pretty simple, I used Stampin' Up word window punch for the tabs then added dots cut with Cuttlebug 3x3 Party die and added 3mm flat back pearls. The blooms were cut with Quickutz Flourish die, cut once in silver and once in pink then attach to the layer of Making Memories paper then added flowers from my stash. Words are computer generated then cut with a Spellbinders tag and ribbon added. Thanks for stopping by...wish me luck!
Congratuations-You Did It-Delightful Sketch Challange #2
Good Morning Bloggers---The 1st Sketch Challenge for Digital Delights went SO well, Wendy is offering a 2nd challenge. The prize will be 3 images of your choice from Digital Delights and once again the DT will vote on the best entry for a Guest Designer Spot. Sketch #2 will run from July 9th thru midnight July 23rd. The DT has been busy working on the sketch. Wendy has some talented girls on her DT---Take a moment to see what we've come up with. They can be viewed here---
http://delightfulsketches.blogspot.com/
Here's my take on the 2nd challenge ---
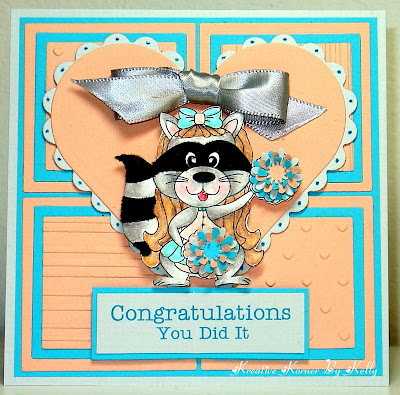
The image is Cleerleader Rosie that I colored with Prisma pencils and OMS then cut the image out and fun flocked the black stripes then layered it on a heart/scallop Nestibility and used a gel pen to dot the scallops. The background layers are embossed with Cuttlebug Love language Combo embossing folder and the Quickutz Stripes Label embossing folder. The poms were made with a small Fiskars flower punch with the center cut from a punch from Michael's dollar bin. I added a ribbon bow. Words are computer generated.
Thanks for stopping by today, enjoy your visit and have a fabulous day!
http://delightfulsketches.blogspot.com/
Here's my take on the 2nd challenge ---
The image is Cleerleader Rosie that I colored with Prisma pencils and OMS then cut the image out and fun flocked the black stripes then layered it on a heart/scallop Nestibility and used a gel pen to dot the scallops. The background layers are embossed with Cuttlebug Love language Combo embossing folder and the Quickutz Stripes Label embossing folder. The poms were made with a small Fiskars flower punch with the center cut from a punch from Michael's dollar bin. I added a ribbon bow. Words are computer generated.
Thanks for stopping by today, enjoy your visit and have a fabulous day!
Wednesday, July 8, 2009
Best Wishes FORE Your Birthday-Spinner Card
Good Morning and Happy Hump Day! Here is a card that I finished but I decided not to send it. It was for my son but I wasn't happy with the plainness of it but wanted to post it anyway because sometimes you need a plain card. It is a spinner card and when tilted the ball rolls to the hole. The instructions can be found on Splitcoaststampers---
http://www.splitcoaststampers.com/resources/tutorials/spinner_card/
The background layer was embossed with Cuttlebug Distressed Stripes embossing folder and the ball was embossed with Cuttlebug Tiny Mosaic embossing folder. The sentiment was computer generated and cut with an oval/scallop Nestibility. The flag was cut free handed and the numbers were cut with Cuttlebug Typewriter Alphabet die. Thanks for dropping by, hope to see you again tomorrow! Have a fabulous day!

Tuesday, July 7, 2009
To Someone Very Special-Happy Birthday!
Good Morning Bloggers! I'm SO happy that you came to visit today. I try to explain how I make my cards but there may be times that I may miss the obvious, if that should happen here, feel free to leave a comment with your name and email address and I will be happy to get back with you. The flowers from my stash were layered on a Flourish Quickutz die that was pop dotted then layered on designer paper that was cut with a circle Nestibility and framed with the scallop Nestibility The scallop layers are cut with Martha Stewart Scallop Lace edge punch then a ribbon and bow were added. Words are computer generated and the Happy Birthday was cut with an oval/scallop Nestibility. 3mm and 5mm flat back pearls were added.. That's it for today. Hope you enjoy your visit. If you see something that you like, won't you leave me a comment to let me know. ..It means SO much to me! Have a great day!

Monday, July 6, 2009
During This Difficult Time...
I want to share a card that I made this evening but before I do, please take the time to read the following---
While visiting a fellow blogger's Blog this evening, I came across a very interesting post that kind of hit home with me. The posting came from Julie's Open Window and the topic of conversation was "More New Friends...More Inspiration" I asked her if I could copy parts of it and post it on my blog and she so graciously agreed. She opened the posting by saying---
"Thanks to all of you who have kindly taken the time to send a quick comment on my recent posts. As bloggers, we know that a comment is the lifeblood of our blogs." I could not agree with her more, your comments are very important to us! How I wish more of you would take the time to comment. She closed the posting by saying---
"So I hope you will take a moment to check out 'The Blogs I Absolutely Love', stop by a few and leave an encouraging comment. It's important for us to know you're out there waiting for our next post." Again, a statement that speaks for itself! For all of you that are out there "lurking" please take the time to post a comment, it means so very much to us!
You can read the entire post on her blog---
http://juliesopenwindow.blogspot.com/
With that being said---here is the card I made tonight, it could be a sympathy card or just a card for someone who may need some added support. It was made with Spellbinders Rose Edgeability then chalked. The words through the window were computer generated on a layer of vellum. A separate sheet of paper was cut 1/4 inch shorter than the base card, folded and sandwiched between the vellum and the back of the card. I thought the paper I had in pink would go with the color of the chalk but it clashed so I opted for white until I am able to find a color of pink that matches. Thanks for stopping by and I'll see you again tomorrow!

For Your Birthday-You CAN Have You Cake And Eat It Too-Gift Card Holders
Good Morning! I hope everyone had a fabulous 4th of July weekend! Here are a couple of gift card holders I made using Dustin Pike's digital images---
http://doodledragon.dustinpike.com/
They both measure 3.5 x 4.75 when closed.
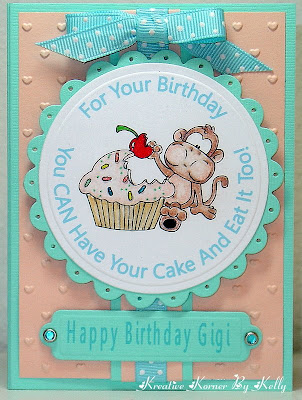
This 1st one is vertically arranged. The image was colored with Prisma pencils and OMS then layered on a circle/scallop Nestibility that I pierced the scallops with a paper piercer. Fun flock was added to the pad of the monkey's foot, glossy accent added to the sprinkles on the cupcake. Happy Birthday Gigi was computer generated and cut with a tag Nestibility with 2 brads added. A ribbon and a bow were added to the band. The background layer was embossed with Cuttlebug Love Language Combo embossing folder.
This is the inside---the pocket was cut with Stampin Up Window Word punch and a Fiskars 1 inch circle punch. The greeting is computer generated.

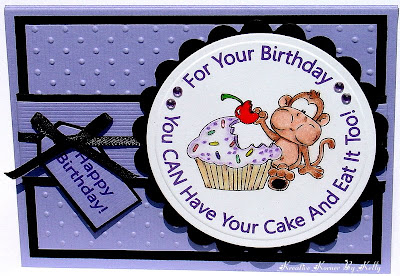
This next one is horizontally arranged. The image was colored with Prisma pencils and OMS then layered on a circle/scallop Nestibility. Fun flock was added to the pad of the monkey's foot, glossy accent added to the sprinkles on the cupcake and flat back gems were added to the circle. The "Happy Birthday" tag was computer generated then cut with Fiskars tag punch and layered on a tag cut from Cuttlebug Tiny Tag set. The background layer was embossed with Cuttlebug Swiss Dots embossing folder and a ribbon and bow were added to the band.
This is the inside---the pocket was cut with Stampin Up Window Word punch and a Fiskars 1 inch circle punch. The "It's Your Day" was cut with the Cuttlebug Birthday Wishes Combo set.

Thanks for stopping by. If you need further instructions on these gift card holders, feel free to leave a comment with your name and email address and I will get back with you. Have a great day!
http://doodledragon.dustinpike.com/
They both measure 3.5 x 4.75 when closed.
This 1st one is vertically arranged. The image was colored with Prisma pencils and OMS then layered on a circle/scallop Nestibility that I pierced the scallops with a paper piercer. Fun flock was added to the pad of the monkey's foot, glossy accent added to the sprinkles on the cupcake. Happy Birthday Gigi was computer generated and cut with a tag Nestibility with 2 brads added. A ribbon and a bow were added to the band. The background layer was embossed with Cuttlebug Love Language Combo embossing folder.
This is the inside---the pocket was cut with Stampin Up Window Word punch and a Fiskars 1 inch circle punch. The greeting is computer generated.

This next one is horizontally arranged. The image was colored with Prisma pencils and OMS then layered on a circle/scallop Nestibility. Fun flock was added to the pad of the monkey's foot, glossy accent added to the sprinkles on the cupcake and flat back gems were added to the circle. The "Happy Birthday" tag was computer generated then cut with Fiskars tag punch and layered on a tag cut from Cuttlebug Tiny Tag set. The background layer was embossed with Cuttlebug Swiss Dots embossing folder and a ribbon and bow were added to the band.
This is the inside---the pocket was cut with Stampin Up Window Word punch and a Fiskars 1 inch circle punch. The "It's Your Day" was cut with the Cuttlebug Birthday Wishes Combo set.
Thanks for stopping by. If you need further instructions on these gift card holders, feel free to leave a comment with your name and email address and I will get back with you. Have a great day!
Friday, July 3, 2009
Another Award
Oh my goodness...another award. This one came from a new follower, The Masked Marauder. Thank you very much for passing the award along to me. With it, I'm suppose to pass it to 15 others but I'm really press for time right now. I will try to do it this weekend. You can visit her Blog at---
http://maskedmaraudercreations.blogspot.com/2009/07/and-award-goes-to.html#comment-form
And if you feel like reading some very deep thoughts, check out her other Blog To Stir Your Soul---
http://stiryoursoul.blogspot.com/
It's Very Moving!
Thanks again to The Masked Marauder...I wish I had a name to go with the masked face!
A Hug For Someone Special
Good Morning and Happy Friday! Here is a card I made this morning using a House Mouse stamp by Stampabilities. The image was colored using Prisma pencils and OMS then layered on a circle/scallop Nestibility, glittered and paper pierced around the edge of the circle. The background layer was embossed with the Cuttlebug Textile embossing folder. The words were computer generated then cut with a Stampin Up word window punch and layered on a Nestibility tag with 2 flatback pearl hearts. Some ribbon with knot bows were added then paper pierced the layers that they were added to. Thanks for stopping by, enjoy your weekend. 
Thursday, July 2, 2009
Have A Happy Happy Birthday
Good Morning!!! Here's another birthday card...gosh there seems as though there a bunch of birthdays this time of year. This card is for my oldest granddaughter and is really quick and easy. This image is a digital stamp by Dustin Pike. He has got some of the cutest images and can be purchased at Doodle Dragon ---
http://doodledragon.dustinpike.com/
It was colored with Prisma pencils and OMS then layered on a circle/scallop Nestibility. Glossy Accents were add to the cupcake sprinkles and brown flat gemstones were added to the circle scallop. A narrow band was added along with ribbon and a bow. The sentiments was cut with an oval/scallop Nestibility and the dots were cut with Cuttlebug 3x3 Party die that 2 pieces of cardstock were glued together before cutting to make it stand off the background layer. All words were computer generated. That's it for today, thanks for stopping by, enjoy your day.
Wednesday, July 1, 2009
Another Dog Gone Birthday!
Good Morning! Gosh I struggled with this one...it's my son's 35th birthday and I had no idea what kind of card to make for him. Doing a guy card is tough so for the good or the bad of it...this is what I came up with. The image is a digital stamp that I got from Digishack---
http://thedigishack.wordpress.com/ that I colored with Prisma pencils and OMS then layered it on a tag Nestibility then layered it onto a small rectangle. The nose was fun flocked, the eyes were glossy accented and rain dots were added. The circle was cut with circle Nestibility then embossed with Cuttlebug Birthday embossing folder. I used the circle scallop Nestibility to frame it and used a piercing tool to punch holes in the scallops.. The words on the tag were computer generated then cut with a tag Nestibility and an eyelet was added along with ribbon and a bow. I know it's a bit cheesy but my mind drew a blank. That's it for today. Thanks for stopping by-enjoy your day!

http://thedigishack.wordpress.com/ that I colored with Prisma pencils and OMS then layered it on a tag Nestibility then layered it onto a small rectangle. The nose was fun flocked, the eyes were glossy accented and rain dots were added. The circle was cut with circle Nestibility then embossed with Cuttlebug Birthday embossing folder. I used the circle scallop Nestibility to frame it and used a piercing tool to punch holes in the scallops.. The words on the tag were computer generated then cut with a tag Nestibility and an eyelet was added along with ribbon and a bow. I know it's a bit cheesy but my mind drew a blank. That's it for today. Thanks for stopping by-enjoy your day!
Subscribe to:
Posts (Atom)


